

OEM Complete Cylinder Heads: The Ultimate Guide for Engine Builders
2026-07-22
Building an engine that truly performs starts with the right foundation. When it comes to cylinder heads, the difference between a solid build and a future headache often lies in the details most overlook. At DDR, we see OEM complete cylinder heads not just as replacements, but as precision-engineered components that deserve a deeper understanding. This guide cuts through the confusion to give engine builders exactly what they need: practical insights, honest comparisons, and those crucial nuggets of wisdom that only come from experience. Whether you're chasing horsepower or chasing reliability, the choices you make here will echo through every revolution of the engine.
Why Factory Castings Often Outperform the Aftermarket
Factory castings are engineered alongside the vehicle itself, ensuring every dimension, material spec, and stress point is accounted for during the initial design phase. This integrated approach means the part isn’t just a standalone component—it’s a seamless extension of the original engineering vision. Aftermarket alternatives, by contrast, often reverse-engineer from a finished product, missing the subtle refinements that come from iterative testing and manufacturer feedback loops. You feel that difference in how the part mates with surrounding components, whether it’s a bracket that aligns without forcing or a manifold that channels heat exactly as intended.
Another quiet advantage of factory castings is material consistency. Manufacturers have access to proprietary alloys and controlled casting processes that simply aren’t available to third-party producers. This isn’t just about strength—it’s about long-term behavior: how the metal ages, expands under thermal load, and resists corrosion in a specific under-hood environment. Aftermarket parts, even those claiming to meet OEM standards, often use generic material blends that can lead to premature wear or subtle fitment drift over time. It’s the difference between a repair that holds up and one that slowly reveals itself.
There’s also the matter of validation. A factory casting goes through a gauntlet of testing—vibration, thermal cycling, fatigue—that’s directly tied to the vehicle’s known operating conditions. These aren’t just pass-fail benchmarks; they involve actual vehicle-level assessments that catch issues a standalone component would never see. Aftermarket products rarely undergo that depth of scrutiny, relying instead on simplified lab tests or, worse, on-the-road trial and error. That’s why a genuine casting often feels like it belongs from day one, while a substitute can introduce new variables you didn’t anticipate.
Decoding OEM Part Numbers: A Practical Approach
OEM part numbers might look like random strings at first glance, but they actually follow internal logic that manufacturers use to encode key information. Once you understand the typical segmentation—such as series, revision, material, or region codes—you can start to extract valuable details without needing a proprietary decoder. For instance, a simple hyphen in the middle often separates the base part from a variant or finish identifier, giving you clues about interchangeability.
A practical way to begin is by comparing part numbers from the same manufacturer side by side. Look for patterns: do certain digits consistently map to a specific engine family, or does a letter suffix always indicate a packaging change? Many manufacturers reuse blocks of numbers for related product lines, so spotting those groupings can save you hours of cross-referencing. Over time, you’ll build a mental library of these patterns, turning what once seemed cryptic into a quick reference tool.
It’s also worth keeping a simple spreadsheet of the part numbers you encounter most often, along with the real-world meaning you’ve confirmed. This habit not only sharpens your own decoding skills but also creates a shareable resource for your team. In many cases, unofficial pattern recognition can be more flexible and up-to-date than official documentation, especially when manufacturers update their numbering schemes without much fanfare.
The Hidden Costs of Skipping OEM Quality
It’s easy to focus on the upfront savings when you bypass OEM quality, but the true costs tend to surface later—often in ways that aren’t immediately obvious. A cheaper component might fit and function initially, yet subtle differences in material composition or manufacturing tolerances can lead to accelerated wear on adjacent parts. What looks like a simple cost-cutting move often sets off a chain reaction of unexpected failures down the line.
One of the most overlooked pitfalls is how non-OEM parts can quietly degrade system performance. For instance, a generic filter might allow slightly more contaminants through, gradually fouling sensitive electronics or precision surfaces. It’s rarely a catastrophic failure right away—more like a slow, creeping inefficiency that drives up energy consumption, reduces output quality, and forces your equipment to work harder than it should. Over months and years, that small compromise compounds into noticeably higher operating costs.
Perhaps the steepest hidden cost, though, is the risk to uptime and safety. When a critical component fails prematurely because it wasn’t built to OEM specifications, the resulting downtime isn’t just about the part itself—it’s about halted production, rushed repairs, and the strain on maintenance teams who now have to scramble. In regulated industries, non-compliance can also lead to fines or liability issues that dwarf the original savings. It’s a classic case of paying less now only to pay much more later, after your reputation and bottom line have already taken a hit.
Torque Sequences and Gasket Choices That Prevent Leaks
Getting the torque sequence right matters as much as the final torque value when you’re trying to keep fluids where they belong. Engineers spend countless hours mapping out the order in which fasteners are tightened on flanges, valve covers, and oil pans because uneven clamping force is one of the quickest ways to invite a leak. The standard approach usually starts with a crisscross or spiral pattern, gradually stepping up the torque in stages rather than hammering one bolt to full tightness right away. This slow, deliberate progression lets the gasket settle evenly across the sealing surface, minimizing distortion that can open up tiny paths for oil, coolant, or combustion gases to escape.
Gasket material often dictates how sensitive the assembly is to the torque sequence. Soft, conformable gaskets like rubber-coated steel or graphite composites can forgive minor missteps, but brittle multi-layer steel (MLS) gaskets used in modern engines demand near-perfect bolt-up discipline. If you rush the sequence or skip the incremental tightening stages, the gasket may not compress uniformly, creating high and low spots that turn into leak channels over time. That’s why many service manuals now specify not only the torque pattern but also intermediate angle-based steps—torque to a baseline, then turn each bolt a certain number of degrees in the prescribed order. It reduces the variability that comes from friction differences and leaves less room for guesswork.
The choice of gasket can actually simplify or complicate the torque sequence requirements. A traditional fiber gasket with a wide sealing bead is more tolerant of distortion, so a simple cross-tightening method often suffices. On the other hand, an MLS gasket with embossed sealing ridges needs very controlled clamp load distribution to avoid crushing the ridges or leaving them under-compressed. In some racing and heavy-duty applications, technicians deliberately alter the factory torque pattern or increase the number of stages to compensate for the stiffer gasket and the higher cylinder pressures involved. Regardless of the application, the rule remains: match the gasket type to the torque sequence, not the other way around, and always recheck torque after a few heat cycles when possible.
Real-World Dyno Comparisons: Stock vs. Upgraded Heads
A bone-stock LS3 pulled 411 hp at 5,900 rpm and 408 lb-ft at 4,600 rpm on a stingy Mustang dyno. After swapping to a set of CNC-ported heads with bigger valves and a slightly more aggressive cam, the same engine laid down 472 hp at 6,200 rpm and 439 lb-ft at 4,900 rpm. The peak numbers tell only half the story—the real magic showed up from 3,500 rpm onward, where the torque curve fattened by 20–30 lb-ft across the board. On the street, that meant the car stopped feeling lazy below 4,000 and started pulling like a freight train the moment you stabbed the throttle.
Another back-to-back test on a budget 5.3L LM7 really drove home the difference. The stock heads choked the engine to a soft 285 hp and the curve nosed over hard past 5,200. With a set of budget aftermarket castings and no other changes, the little 5.3 picked up 52 hp at peak and carried power cleanly to 6,400 rpm. The owner laughed when he saw the graph—same short block, same intake, but the engine suddenly sounded angrier and felt like it had an extra half-liter of displacement. The dyno sheet didn’t just show bigger digits; it showed an engine that wanted to rev instead of falling on its face.
Perhaps the most telling comparison came from a heavy truck owner who swapped heads on an otherwise factory LQ4. Before the swap, the truck wheezed up a grade in third gear at 4,000 rpm. After bolting on a set of high-flow rectangular-port heads, the same hill became a fourth-gear cruise at 2,600 rpm with less throttle. The dyno confirmed it: peak torque jumped from 418 to 463 lb-ft, but more importantly, 400 lb-ft was available by 2,800 rpm and held past 5,200. That kind of spread turns a vehicle from a one-trick pony into something that pulls cleanly everywhere, no excuses.
When to Rebuild and When to Replace Entirely
Deciding between a rebuild and a full replacement often comes down to a few practical questions: Is the foundation still solid? Can the changes be made without tearing everything down? A redesign might make sense when the underlying architecture is robust, but the surface needs a refresh—think outdated visuals or clunky workflows that can be improved with selective updates. It’s like renovating a well-built house rather than demolishing it.
On the other hand, replacement becomes the better route when maintaining the current system feels like patching a sinking ship. If the technology stack is obsolete, scaling has become a nightmare, or you’re constantly fighting against technical debt, starting over can be less painful in the long run. The key is to honestly assess whether the time and money spent on partial fixes will actually solve the deeper issues, or just delay the inevitable.
Sometimes the decision isn't purely technical. A rebuild can preserve years of business logic and knowledge embedded in the existing code, while a replacement might wipe that out. But if user expectations have shifted dramatically and the core functionality no longer aligns with what people need, incremental improvements won’t cut it. Weigh the cost of ongoing frustrations against the upfront investment of building anew—often, a clean slate leads to fewer compromises.
FAQ
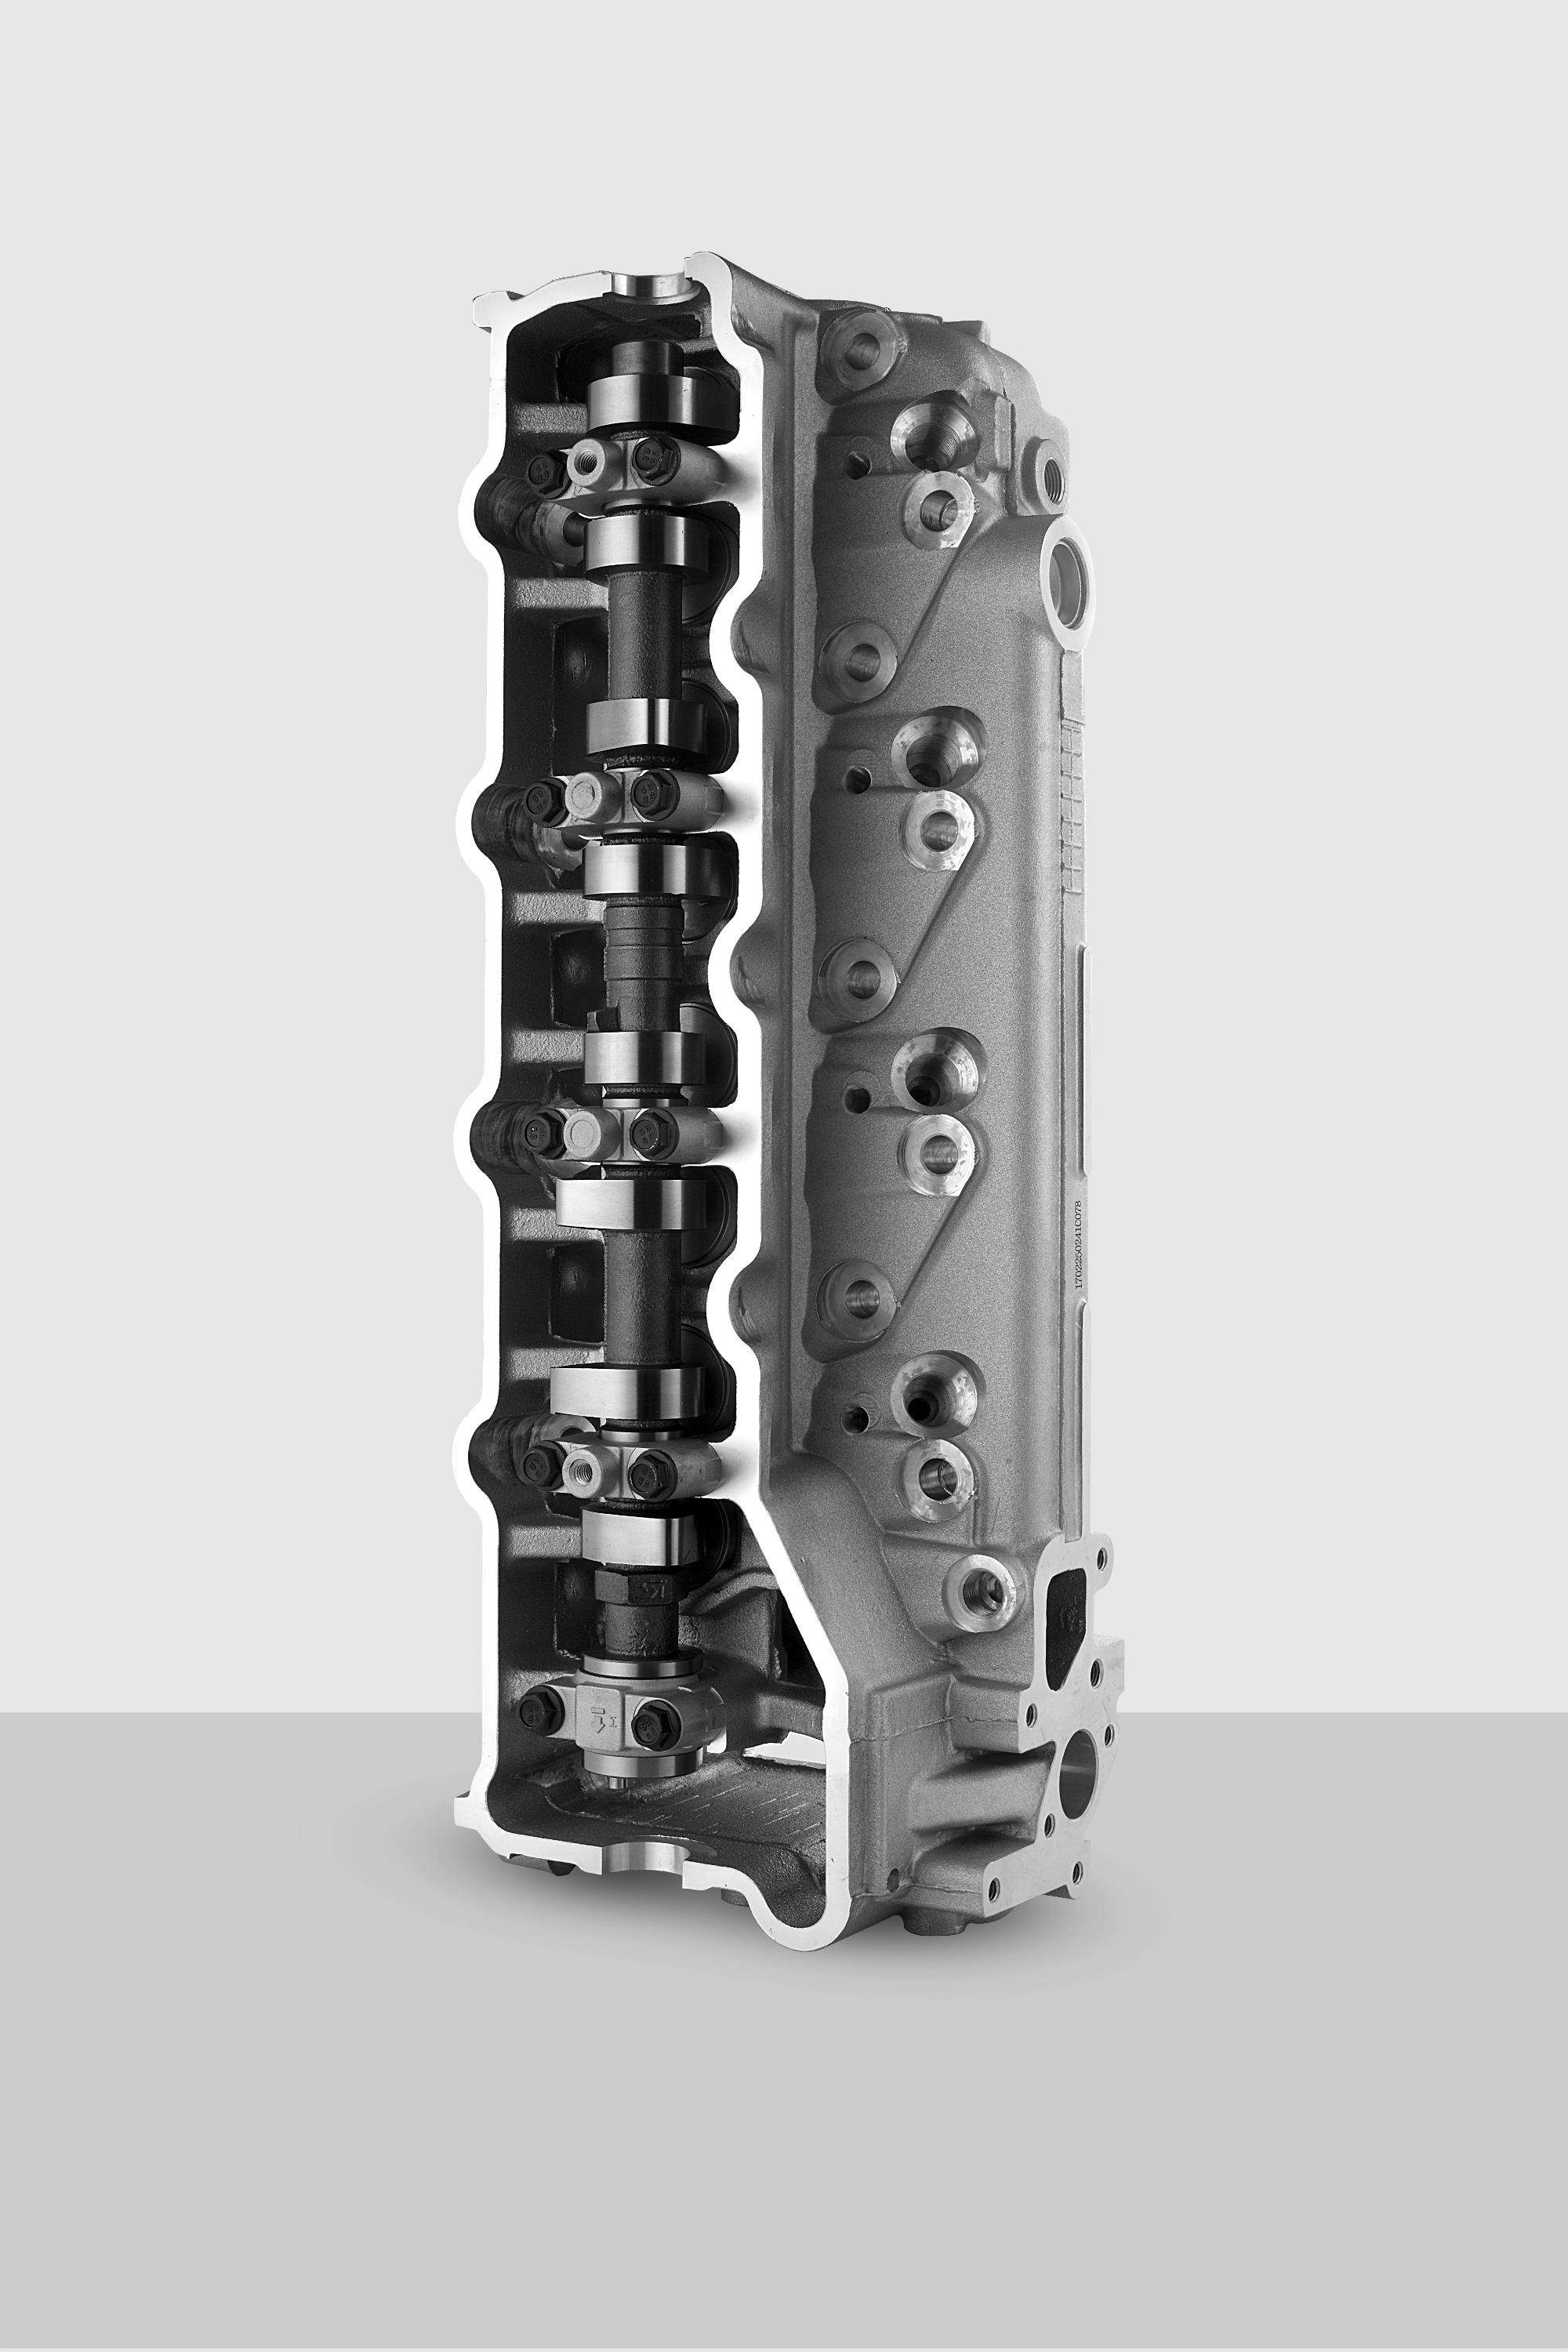
An OEM complete cylinder head is a fully assembled unit straight from the original manufacturer, ready to bolt onto your engine block. It comes with valves, springs, retainers, seals, and often camshafts already installed and set to factory tolerances. Unlike a bare head, which is just the raw casting and requires you to transfer or buy every component separately, a complete head is a time-saver. Remanufactured heads, on the other hand, are used units that have been cleaned, machined, and rebuilt with new parts, but they may not meet the exacting new-part specifications that a fresh OEM head guarantees.
Engine builders often opt for OEM complete heads when the goal is a stock rebuild, a factory-spec restoration, or a reliable daily driver build. The primary draws are guaranteed fitment, no guesswork on valvetrain geometry, and the peace of mind that comes with original engineering. Aftermarket heads can offer bigger valves or better flow for high-rpm power, but they frequently require additional clearancing, tuning, and supporting mods. For a builder who values straightforward assembly and long-term durability under normal operating conditions, an OEM complete head is a plug-and-play solution that avoids the potential headaches of matching aftermarket components.
Spotting a genuine OEM head takes a sharp eye. Look for the manufacturer’s logo and part number cast into the metal, along with consistent machining marks and proper packaging. Genuine units usually come in sturdy, branded boxes with informational inserts, while counterfeit ones often arrive in plain or generic packaging. Check the quality of the valves and springs—OEM parts will have a uniform finish and precise markings. If the price seems too good to be true and the seller can't provide a verifiable purchase history from a licensed dealer, it's wise to walk away. When in doubt, cross-reference the part number directly with the manufacturer's official catalog.
Even a factory-fresh head demands a thorough pre-install check. Always verify that the camshafts rotate freely and that the cam caps are torqued in sequence. Visually confirm all valves are seated properly and that retainers and keepers are fully engaged. Check the deck surface for nicks or warping with a precision straightedge, and chase all bolt-hole threads with a tap to remove any protective coatings or debris. It’s also smart to squirt a little oil into the intake and exhaust ports and cycle the valves a few times to make sure nothing binds. This extra half-hour can save you from a catastrophic failure after startup.
While it's tempting to save money by reusing timing chains, tensioners, and guides, it's a risky move. A fresh head demands a consistent, slop-free timing signal to operate correctly, and worn components can introduce erratic cam timing that may lead to poor performance or even piston-to-valve contact. Most OEM manufacturers explicitly recommend replacing the entire timing set when installing a new head to uphold the warranty and ensure reliability. Think of it as cheap insurance: the cost of a new chain, guides, and tensioner is minimal compared to the damage a skipped gear or broken guide can cause.
Torque specs and sequences are not generic—they are specific to each engine family and often printed right in the factory service manual. Typically, you'll find a multi-step procedure: start with a low torque in a spiral pattern from the center out, then do a second pass to a higher value, and finally add angle-tightening in the same sequence. Some engines use torque-to-yield bolts that must be replaced every time. Never rely on memory or a one-size-fits-all approach; even a slight deviation can cause uneven clamping, head gasket failure, or cylinder distortion. Always look up the exact numbers for your engine code before you pick up a wrench.
Yes, most OEM complete cylinder heads from major manufacturers come with a limited warranty that covers defects in materials and workmanship. The coverage period can range from 12 months/unlimited miles to a longer factory drivetrain warranty if installed by a certified shop. However, these warranties typically do not cover damage caused by improper installation, overheating, oil starvation, or modifications like turbocharging that exceed factory boost levels. To keep the warranty valid, you often need to document that a professional technician performed the install and that you used new, OEM-specified gaskets, bolts, and fluids. Always read the fine print and keep your receipt.
Rebuilding makes sense when you're working with a rare or vintage casting that isn't available new, or when you plan on custom porting, installing oversized valves, or upgrading to a hotter cam profile right from the start. It can also be the budget-friendly route if the original head only has minor wear and the machine shop costs are low. However, if the old head is cracked, heavily corroded in the water jackets, or has suffered a severe warp that requires extensive surfacing, a new OEM complete head often ends up cheaper and more reliable. Factor in the price of all new components—valves, springs, seals, seats, guides, and labor—and you may find that a factory-fresh assembly is the smarter financial decision.
Conclusion
Engine builders chasing horsepower often overlook a simple truth: the factory casting sitting on the bench might be a better foundation than any shiny aftermarket alternative. Decades of OEM R&D go into metallurgy, coolant passage design, and stress relief—details that budget aftermarket castings often miss. Digging into part numbers isn't just administrative tedium; those stamped digits reveal crucial variations in valve angles, chamber volumes, and seat materials across model years, helping you cherry-pick the best factory head for your build. And while that bargain rebuild kit may save cash upfront, the hidden costs emerge later—microporosity in cheap castings leads to coolant loss, soft seats sink under valve springs, and inconsistent decks blow head gaskets before your first oil change.
Preventing leaks starts with respecting the OEM torque sequence and using the right gasket tech; multi-layer steel shims work wonders where old composite designs fail, but only if you follow the bolt tightening ritual exactly. Real-world dyno tests consistently show that a well-prepped OEM head with a performance valve job can match or out-flow entry-level aftermarket aluminum heads, all while retaining the reliability of a casting that's already been heat-cycled thousands of times. Finally, knowing when to rebuild versus replace means honestly assessing the old head's condition—deep corrosion or major cracks spell replacement, but a solid core that just needs a skim cut and fresh guides is often a smarter investment than gambling on questionable new castings.
Contact Us
Contact Person: Shelly
Email: [email protected]
Tel/WhatsApp: 8613967667688
Website: https://www.yongyu.com/