
How to Maintain and Replace Your Cylinder Head Valve Cover for Optimal Engine Performance
2024-08-26
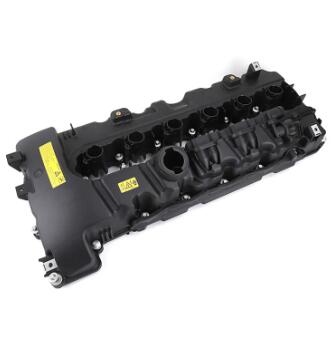
Maintaining your vehicle’s engine in top condition requires attention to all its components, and the Cylinder Head Valve Cover is no exception. Although it's often out of sight and out of mind, ensuring that this component is in good working order is essential for preventing oil leaks and protecting your engine’s internal parts. In this blog, we’ll discuss how to maintain and, if necessary, replace your valve cover to keep your engine performing at its best.
Signs That Your Cylinder Head Valve Cover Needs Attention
Before diving into maintenance and replacement, it’s important to recognize the signs that your valve cover may need some attention. Here are some indicators that it’s time to inspect your valve cover:
1. Oil Leaks: If you notice oil pooling on top of the engine or dripping onto the ground, it’s likely that the valve cover gasket is worn out or the valve cover itself is damaged.
2. Burning Oil Smell: A burning oil smell, especially after driving, can indicate that oil is leaking onto hot engine components, which could be due to a faulty valve cover or gasket.
3. Engine Misfire: In some cases, an oil leak from the valve cover can lead to an engine misfire, particularly if the oil contaminates the spark plugs or ignition coils.
4. Decreased Engine Performance: If your engine isn’t running as smoothly as it should be, it could be due to issues with the valve cover or the PCV valve.
How to Inspect and Maintain Your Valve Cover
Regular inspection and maintenance of your valve cover can help prevent issues before they become serious problems. Here’s a step-by-step guide:
1. Visual Inspection: Start by visually inspecting the valve cover for any signs of oil leaks, cracks, or warping. Pay special attention to the areas around the bolts and the gasket.
2. Check the Gasket: The valve cover gasket is a common source of leaks. If you notice any oil around the edges of the valve cover, the gasket may need to be replaced.
3. Inspect the PCV Valve: If your valve cover is equipped with a PCV valve, inspect it to ensure it’s functioning properly. A clogged or faulty PCV valve can cause pressure build-up in the engine, leading to oil leaks.
4. Clean the Valve Cover: Over time, dirt and oil can accumulate on the valve cover. Clean it with a soft cloth and a mild cleaner to remove any debris. This will make it easier to spot potential issues during future inspections.
5. Tighten Bolts: Check the bolts securing the valve cover to the cylinder head. If they are loose, gently tighten them, but be careful not to overtighten, as this can cause the cover to crack.
Replacing the Cylinder Head Valve Cover
If your inspection reveals significant damage to the valve cover or if the gasket is beyond repair, it may be necessary to replace the valve cover. Here’s a general guide to replacing the valve cover:
1. Gather Tools and Parts: You’ll need a replacement valve cover and gasket, a socket wrench, and a torque wrench. Make sure you have the correct parts for your specific vehicle model.
2. Remove the Old Valve Cover: Start by disconnecting any components that may be in the way, such as ignition coils or wiring. Then, use a socket wrench to remove the bolts securing the valve cover. Carefully lift off the valve cover.
3. Clean the Cylinder Head Surface: Before installing the new valve cover, clean the cylinder head surface to remove any old gasket material or debris. This will ensure a proper seal.
4. Install the New Gasket: Place the new gasket onto the cylinder head, ensuring it is properly aligned.
5. Install the New Valve Cover: Carefully place the new valve cover over the gasket and cylinder head. Hand-tighten the bolts to hold it in place.
6. Torque the Bolts: Use a torque wrench to tighten the bolts to the manufacturer’s specifications. Be sure to tighten them in a crisscross pattern to evenly distribute the pressure.
7. Reconnect Components: Reconnect any components you removed, such as ignition coils or wiring.
8. Check for Leaks: After installation, start the engine and check for any oil leaks around the valve cover. If everything looks good, you’re done!
Conclusion
Maintaining and, when necessary, replacing your cylinder head valve cover is essential for keeping your engine in top condition. Regular inspections can help you catch potential issues before they become serious problems, while a well-executed replacement can prevent oil leaks and protect your engine’s internal components. By taking care of your valve cover, you’ll help ensure that your engine continues to perform at its best for years to come.